Configuring Location Maps in Primo
- Keven Jeffery (Unlicensed)
- brandon dudley (Unlicensed)
Compiled byTyler Rogers, 3/13/2017
Below are the steps to activating location maps in Primo. This method requires that you have digital version of your floor plans as well as access to a publicly-accessible server.
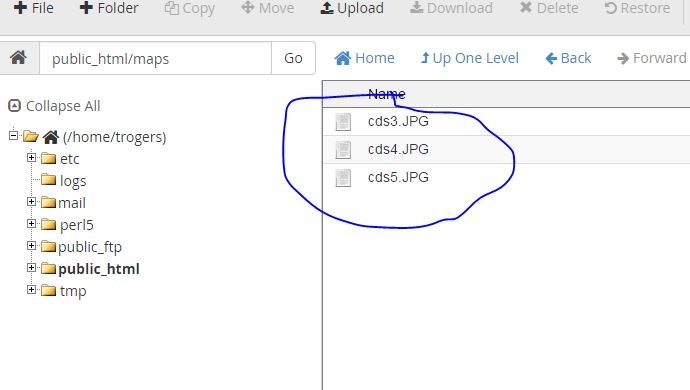
1: Load your maps to a website. Make sure the file names match the location codes you have in Alma. In the example below we’re using location codes “cds3, cds4 and cds5”.
Figure 1: Floorplan JPEG files hosted on the library’s server.
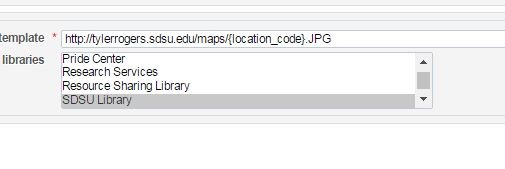
2: Follow the Alma Knowledge base instructions for configuring the stack maps service:
-- Note that in this case you will be pointing to the directory in which you stored the files in step 1.
Figure 2: Integration Profile Configuration Page
3: Once you have configured this you should see a “locate” button in views for physical holdings. This link should take you to your map.
Figure 3: Public Display of the link to the floor plan:

4: Note that if you have more than one location code on a floor, you may want to edit your image files to make it clear where the book would be located on that floor. For example, if you have an oversize section with location code “fos4”, you may want to edit that image so that it points to your oversize section instead of the regular book stacks.