Primo Send-To Configuration
- Christina Mune (Unlicensed)
Owned by Christina Mune (Unlicensed)
Feb 23, 2017
Loading data...
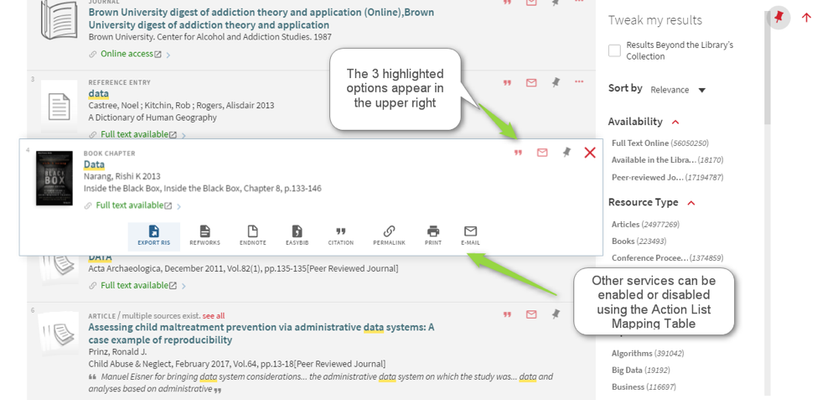
Configuration of the Send-To Areas within Primo can be configured within the Primo Back Office. From within the Actions List mapping table, different services can be configured to appear in the Primo Front End, and of those services 3 can be highlighted, or made to appear in the upper right corner of brief display. One note that the first option in this list must always be the e-shelf option.
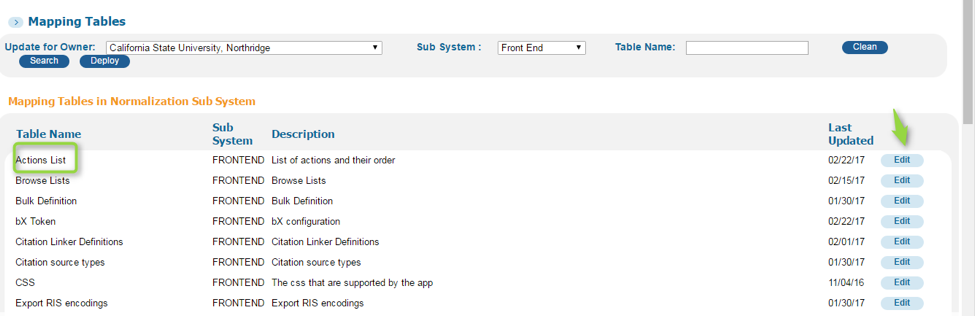
Mapping Tables – Enable or Disable Services
- In the Primo Back Office, navigate to Primo Home > Advanced Configuration > All Mapping Tables
- From the Mapping Tables Configuration Area, locate the Action List mapping table and click Edit
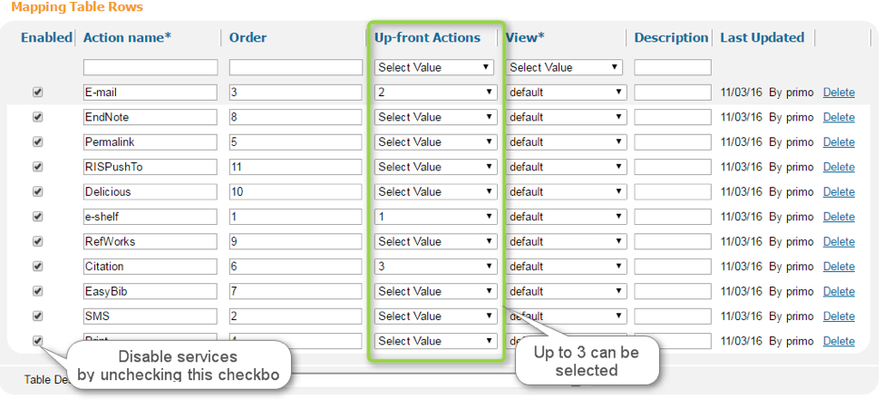
- Within this table, you may enable or disable any of the listed services. To disable a service, simply uncheck the Enabled checkbox located on the left of the table.
- Up to Three services can be configured to appear in the upper right corner of the brief result (See Screenshot). The first of these services must be e-shelf, but all others can be configured to appear in this area. To configure, select a numbered position I in the Up-Front Actions column
- You may also select a View for which these settings to be applied in the Views column. By selecting Default the settings will be applied to all Views
- Once changes have been made, click Save, in the Lower Right.
- ON the Mapping Tables page, click Deploy in order to see the changes published to the Front End.
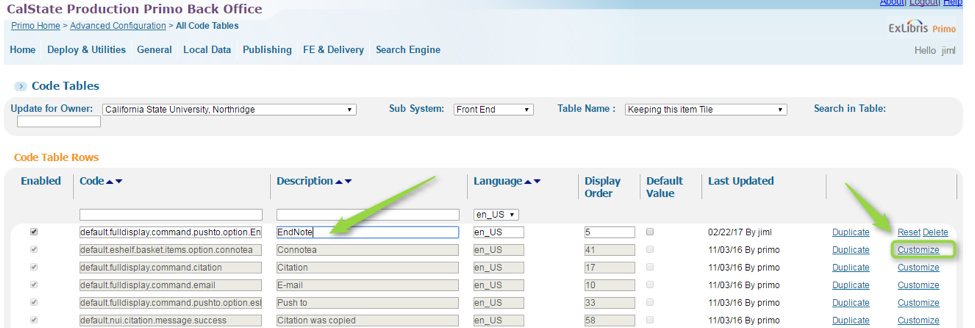
Code Tables
The labels used for the Send To services can be configured within the Code Tables located in the Primo Back Office
- In the Primo Back Office, navigate to Primo Home > Advanced Configuration > All Code Tables
- From the Code Tables Configuration Area, locate the Keeping this Item Tile from the list and click edit
- To simply the display, select en_US from the Language Column.
- To customize any of the labels used in the Primo Front End, click on the Customize link located in the right column for each entry
- Select Save and Continue to save your changes
ON the Code Tables Configuration Page, click Deploy to push your changes to the Front End.
Mapping Tables
Primo Front End
Code Tables