Lost & Paid Status
View demonstration – starts at 43:00
Updating configuration
Update your fulfillment configuration to turn on the Lost and Paid status. The new status will begin once the configuration is changed. This setting is not retroactive and will not affect items with the Lost status.
- Navigate to Other Settings in the Fulfillment Configuration under General.
- Click the three dots on the row for the close_paid_lost_loan parameter and select Customize.
- Change the parameter value to true.
- Save.

Payment workflow
Payments are collected through the patron’s account as usual. The paid item is removed from the patron’s All Titles list after the payment is collected.
- Prior to the payment, the item is shows in the patron’s All Titles list with a status of Lost.
- Click Pay and follow instructions to collect the payment.
- The Lost Item Replacement Fee is closed and the item is removed from the patron’s record.
Before:

After:

Item record
The item record now has a process type/status of Lost and Paid.
In Alma

In OneSearch
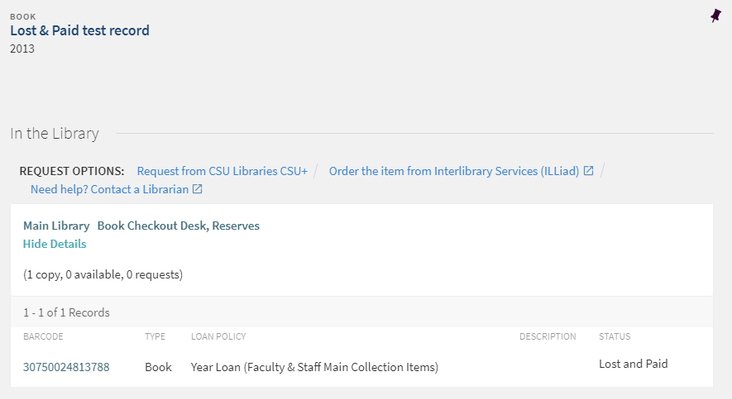
Lost & Paid Items that are Returned
The link between the patron and the item is not severed, so when an item is returned a credit will be added to the patron’s account and the Fulfillment Lost Refund Fee Loan Letter is sent, if active.

Credits can be waived if allowed by your campus processes and configured in Alma.
Sets
Sets can be used to keep track of the items in the Lost & Paid status.
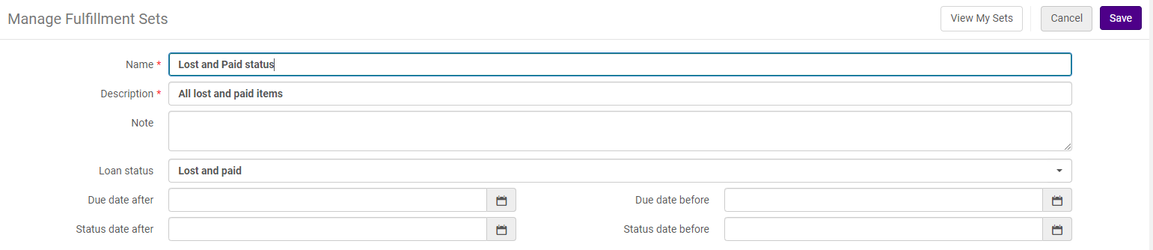
Fulfillment Set
Fulfillment sets are itemized and will include all items in the Lost and Paid status based on your parameters at the time the set is created. Since items are not automatically removed from the set, you will be able to see if an item has been returned. The set will need to be created again to capture future Lost and Paid items.
- Select Create Fulfillment Sets from the Fulfillment menu under Advanced Tools.
- Enter a Name and Description for the list. Select Lost and Paid from the Loan status Add a Note and date filters, if needed. Click Save.
- To view your set, click View My Sets or select Manage Sets from the Admin menu under Monitor Jobs and Sets.
- Select Members from the Actions menu for the set.
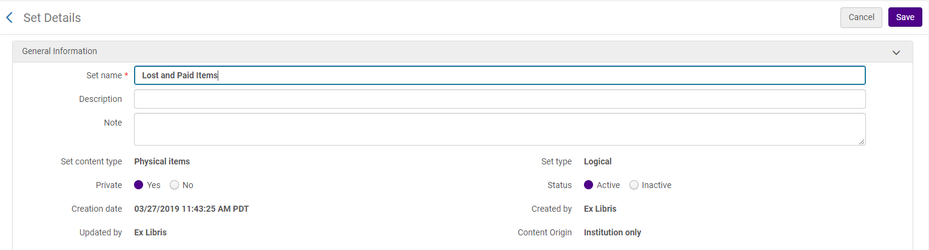
Logical Set
Logical sets run each time the set is opened, so it always grabs the most current set of records. The set only needs to be created once to show the full list of Lost and Paid items. However, you will not be able to see any items that have been returned and the Lost and Paid status cleared.
- In the Advanced Search bar, select a Physical Items search where the Process type equals Lost and paid.
- Click Save Query.
- Enter a Name. Add a Description and Note, if needed. Click Save.
- A job will run to create your set. It may not immediately show in your set list.
- To view your set, select Manage Sets from the Admin menu under Monitor Jobs and Sets.
- Select Results from the Actions menu for the set.
Analytics
The Waived / Credit report, created by SDSU, shows all credits or waived transactions within the last 30 days. This report can be used to show credits created by returned Lost and Paid items.
- In Analytics, navigate to Shared Folders – Community – Reports – Institutions – CalState – Fulfillment – Verified Reports – Fines, Fees, and Bills - Waived/Credit for last 30 Days Dashboard_SDSU_02012019
Deactivate Refund Letter
The Fulfillment Lost Refund Fee Loan Letter is sent when a Lost and Paid item is returned and a credit is added to the patron’s account. This letter can be deactivated.
- Navigate to Letter Activity in the General Configuration menu under General Configuration.
- Select Customize from the menu next to the FulLostRefundFeeLoanLetter letter.
- Select the Enabled It will turn gray when deactivated.
- Click Save.

Configure so that Credits can be Waived
Credits cannot be waived by default. Update the Fine Fee Type Definition table to allow the waive.
- Navigate to Fines/Fees Behavior in the User Management Configuration under Patron Charges.
- Select Customize from the menu next to Credit.
- Change the option in the Waiveable column to True.
- Click Save.
