Updating User Records in Bulk
- Cathe Olson (Unlicensed)
Owned by Cathe Olson (Unlicensed)
The Update/Notify Users job can be used to add/remove blocks, add notes, change user groups, assign or remove roles for a group of users, etc. Roles that require “scoping” cannot be bulk updated with the Update/Notify Users job.
Part A–Create the set of users
The file of user id’s that you want to modify can be created using the Design Analytics module from Alma or manually as an Excel file. Both options are shown.
Option 1: Use Design Analytics to create analysis of users and create set.
New -> Analysis
Subject area: User
Criteria:
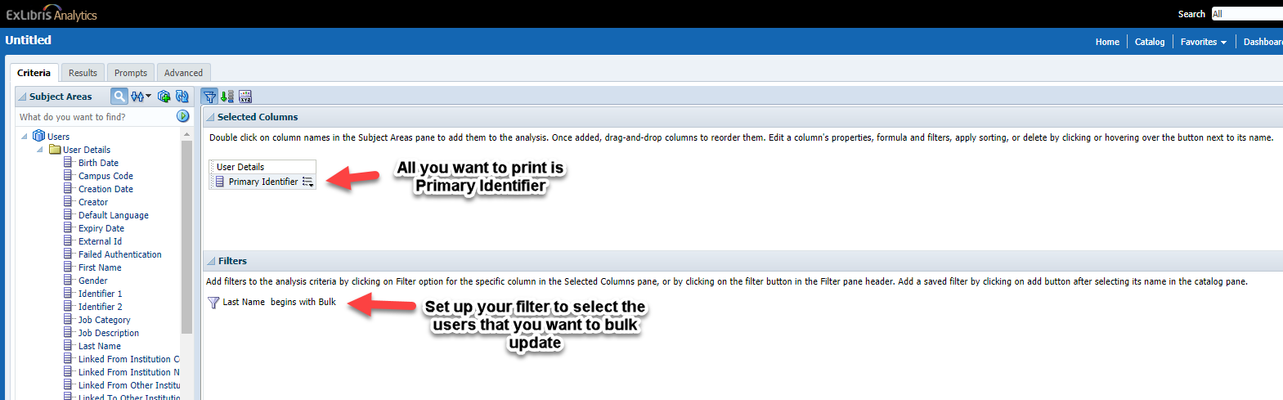
Results:
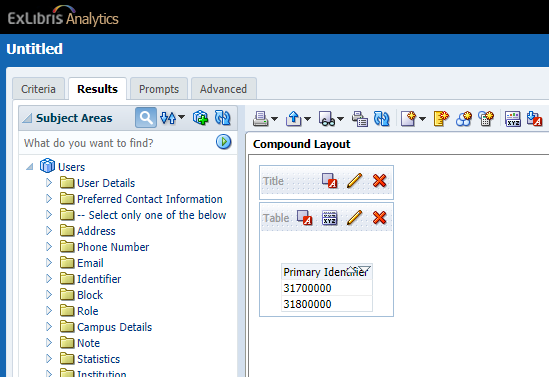
- Change column header
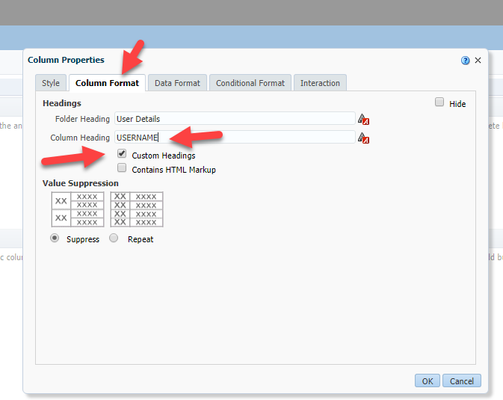
- In Criteria, click on the little arrow next to Primary Identifier and select Column Properties.
- Go to the Column Format tab.
- Click “Custom Headings” and override primary identifier with USERNAME.
- Click OK
- Click the save icon to save and name the analysis for use in Alma.
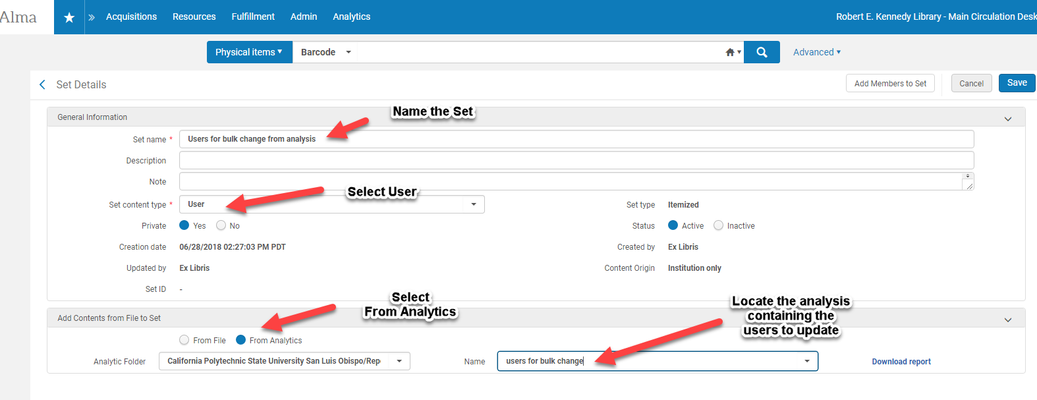
- In Alma, create an itemized set based on analysis.
- Admin -> Manage Sets -> Add Set -> Itemized
- Name the set
- Set content type: User
- Add contexts from File to Set: From Analytics
- Analytic Folder/Name: Select the analysis containing the user ids.
- Save.
- Monitor Jobs -> History
- Refresh until the job is completed.
- View Report to make sure members were added the members to the set.
- Proceed to Part B
Option 2: Create an excel file of users and create set.
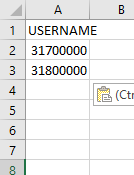
- Create an Excel file of primary ids.
- First line must be USERNAME
- Then the list of ids.
- Example:
- In Alma, create an itemized set based on the Excel file.
- Admin -> Manage Sets -> Add Set -> Itemized
- Name the set
- Set content type: User
- Add contexts from File to Set: From File
- Click on the little icon to the right of the File box and locate the excel file containing the user ids.
- Double click on the file name.
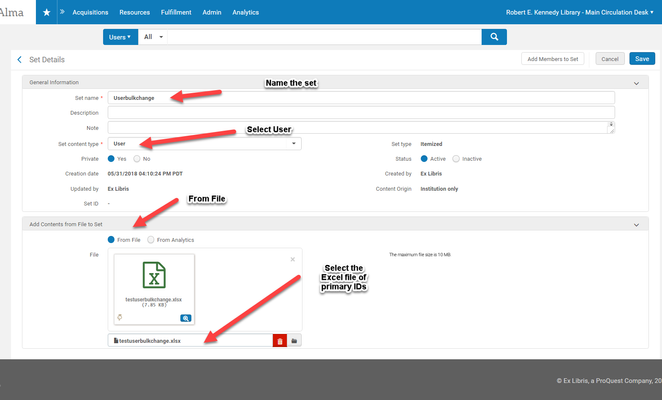
- Save
- Monitor Jobs -> History
- Refresh until the job is completed.
- View Report to make sure members were added the members to the set.
- Proceed to Part B.
Part B – Run the Update Job
- In Alma: Admin -> Run a Job
- Click the circle next to Update/Notify Users
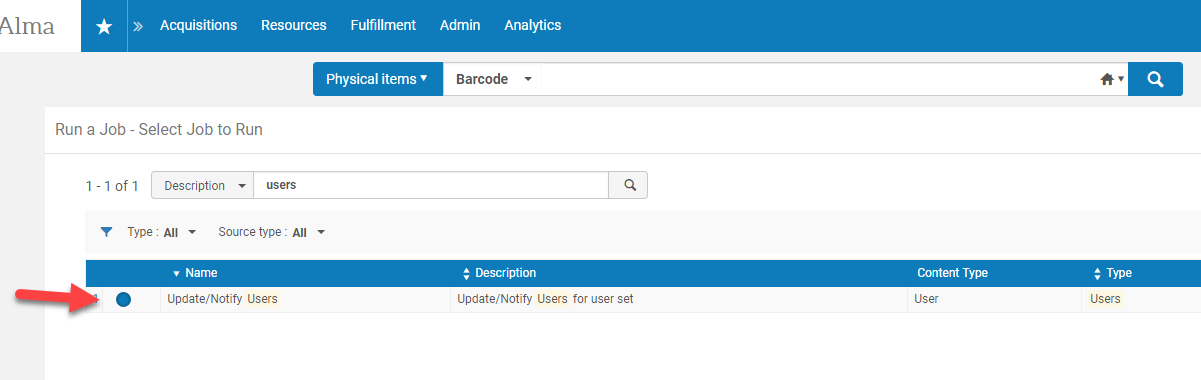
- Next
- Click the circle next to the set of users you created in Part A
- Next
- Click on the box next to the field you want to update, ex. Add note
- Use drop down/conditions/fill in fields as applicable, ex. note text.
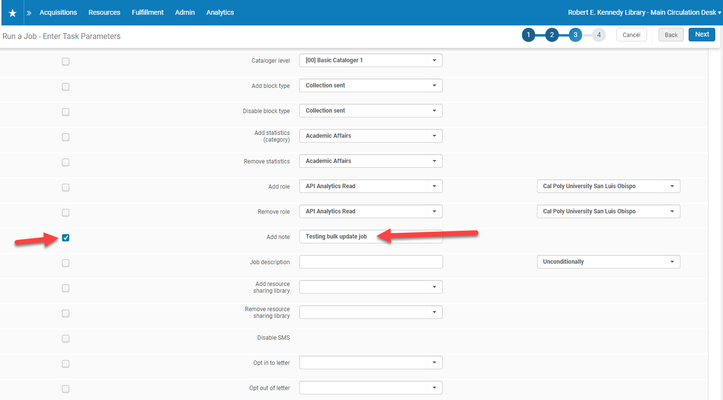
- Next
- Submit
- Confirm
- Admin -> Monitor Jobs -> History
- Refresh until the job is completed.
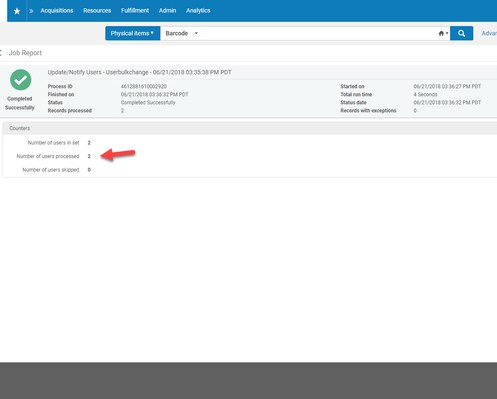
- Hopefully the status is “Completed Successfully”.
- Click on ‘…’ and select Report to view results.
Note:
Corey from Channel Islands pointed out that the results for what headers show to you in that error screen below (or what headers are allowed/expected) will vary from local site to site. I think USERNAME works for everyone but they might see a slightly different list of allowable headers.
- CSUN has: FACEBOOK, OTHER_ID_4, OTHER_ID_3, OTHER_ID2, OTHER_ID1, BARCODE, USERNAME, UNIV_ID, TWITTER GOOGLE
- Channel Islands has: FACEBOOK, USERID, USERNAME, INST_ID, TWITTER, EMPLID, GOOGE